Mandolin Setup Guide: How to Dial In Action, Intonation, and Tone
This mandolin setup guide walks you through the exact adjustments that decide whether your instrument feels effortless or fights you on every note. A mandolin setup is the process of adjusting string action, nut slot height, neck relief, bridge placement, and intonation so the instrument plays easily, frets cleanly, and stays in tune all the way up the neck. Most playability problems beginners blame on themselves are really setup problems, and most of them are fixable in an afternoon.
You don't need a workshop full of tools to make real improvements. You need the right targets, the right order, and the judgment to know which jobs are safe at home and which belong with a luthier. That's what this guide gives you.
Mandolin Setup Specs at a Glance
If you want the short version, here are the target numbers most players and techs work toward on a standard A-style or F-style mandolin. Treat them as starting points, not absolutes, because every instrument and playing style is a little different.
| Setup adjustment | Typical target | What it controls |
|---|---|---|
| Action at 12th fret (G / bass) | ~0.050 in (1.3 mm) | Playing ease vs. volume and chop |
| Action at 12th fret (E / treble) | ~0.040 in (1.0 mm) | Slightly lower than the bass side |
| Action at 1st fret (bass) | ~0.012–0.015 in | Nut slot height, first-position feel |
| Action at 1st fret (treble) | ~0.010–0.012 in | Open-string buzz vs. easy fretting |
| Neck relief | Near zero (nearly flat) | Buzz, fretting effort, intonation |
| Intonation | 12th-fret note matches open octave | In-tune playing up the neck |
| String radius at bridge | Matches fretboard radius | Even feel across all courses |
Key takeaway: Lower action is easier to play; higher action gives more volume and a cleaner bluegrass chop. The goal is the lowest action your technique can drive without buzzing.
What This Guide Covers
- What a mandolin setup actually is
- Why setup matters more than beginners think
- The tools you need
- The setup, step by step
- Choosing strings to match your setup
- DIY vs. a professional luthier
- How often to set up a mandolin
- Mandolin setup FAQ
What a Mandolin Setup Actually Is
People use the word "setup" loosely, so it helps to be precise. A setup is a coordinated set of adjustments, not a single fix. Change one thing and you often nudge another, which is why order matters.
A complete mandolin setup touches these areas:
- Neck relief: How straight or slightly curved the neck sits under string tension.
- Action (string height): How far the strings sit above the frets, measured at the 12th fret.
- Nut slot height: String height at the first fret, which governs how the instrument plays in first position.
- Bridge placement: Where the floating bridge sits, which sets intonation.
- Intonation: Whether fretted notes match the open strings as you move up the neck.
- String choice: Gauge and material, which interact with all of the above.
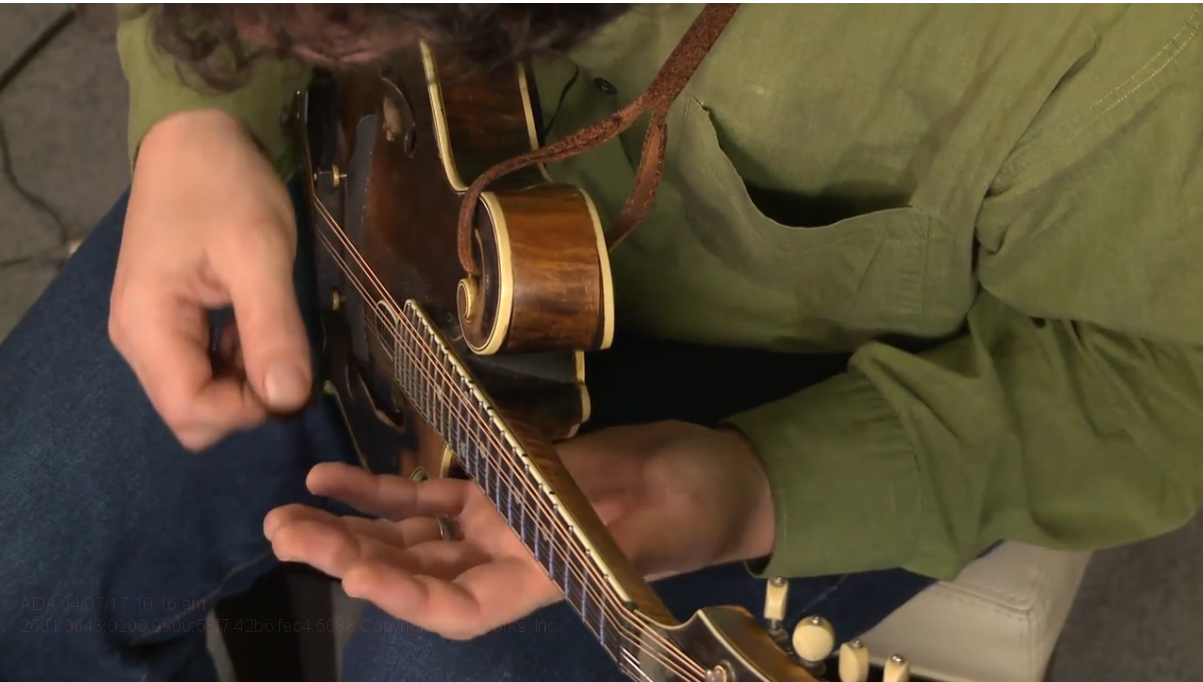
The mandolin has one feature that makes setup especially sensitive: a floating bridge held in place only by string tension. It isn't glued down. That means you can adjust both height and position yourself, but it also means a careless string change can knock your intonation out completely. Respect the bridge and a lot of the rest follows.
Why Setup Matters More Than Beginners Think
I've watched plenty of new players assume they lack talent when the real culprit was an instrument that was never set up. The strings sat too high, the neck had a bow, the bridge was in the wrong spot, and every chord felt like a fight. Once the setup was corrected, the same player suddenly sounded and felt competent.
Here's the practical reality. With double courses under high tension, a mandolin punishes a bad setup harder than a guitar does. High action doubles your effort because every note requires pressing two strings. Poor intonation means the instrument sounds out of tune even when your tuner says each open string is perfect. A bowed neck creates buzzing in some positions and stiffness in others.
If your fingers feel like they're working too hard on every note, don't assume you need stronger hands. First, check the setup.
This is also why a good setup pays off faster than almost any gear upgrade. A modest instrument that's set up well will out-play an expensive one that isn't. If you're still choosing an instrument, our overview of mandolin lessons and instrument basics covers what to look for before you ever reach the setup stage.
Tools You Need for a Mandolin Setup
You can do a solid home setup with a short, affordable kit. None of this is exotic.
- Feeler gauges or a string-action gauge: For measuring action accurately instead of guessing.
- A clip-on chromatic tuner: For tuning and for checking intonation at the 12th fret.
- A small ruler or straightedge: For checking neck relief and string radius.
- A fresh set of strings: Always set up on the strings you intend to play.
- A soft cloth and a pencil: The cloth protects the top; graphite in the nut slots reduces friction and tuning hang-ups.
One tool note specific to the mandolin: if your bridge has small adjustment wheels, you can raise and lower action without any disassembly. Counterclockwise raises the bridge, clockwise lowers it. That single feature makes action one of the most beginner-friendly adjustments on the instrument.
The Mandolin Setup, Step by Step
Work in this order. Each step assumes the previous one is done, because adjustments interact. Skipping around is the most common reason a home setup never quite settles.
Step 1: Install fresh strings and tune to pitch
Always start a setup on new strings, because old strings change the tension and feel you're trying to dial in. String the mandolin one course at a time, tune to G-D-A-E, and let everything stretch. Changing strings one course at a time keeps tension on the floating bridge so it doesn't shift or fall.
Step 2: Check and set neck relief
Most mandolin necks play best when they're nearly dead flat. To check, fret a course at the first fret and at the body end at the same time, then look at the gap over the middle frets. You want very little gap.
Here's the important caveat: not all mandolins have an adjustable truss rod. Many necks are fixed. Only adjust relief if your instrument has an adjustable rod, and then move it in small increments, retuning and rechecking between turns. If the neck has a noticeable bow and there's no truss rod, that's a luthier conversation, not a home fix.
Step 3: Set action height at the 12th fret
This is the adjustment most players feel immediately. Measure from the top of the 12th fret to the bottom of the string. A comfortable, widely used target is about 0.050 in under the G (bass) course and 0.040 in under the E (treble) course, with the bass side slightly higher than the treble.
Raise or lower the bridge using its adjustment wheels. Lower action plays easier; higher action gives you more volume and a crisper chop. If you play hard-driving bluegrass rhythm, you may prefer the action a touch higher so you can dig in without buzzing.
Lower the action until you just start to hear buzz, then bring it back up slightly. That's usually your sweet spot for your technique and string gauge.
Step 4: Set nut slot height
Nut height controls how the mandolin plays in first position, and it's where a lot of "this thing is hard to fret near the headstock" complaints come from. Aim for roughly 0.012 to 0.015 in of clearance at the first fret on the bass side and about 0.010 to 0.012 in on the treble side. A simple field check: when you fret a course at the third fret, the string should sit just barely off the first fret.
Cutting nut slots is the one early step where caution pays. You can deepen a slot, but you can't easily undo it. If a slot is clearly too high, take small passes or hand it to a tech. If the strings buzz on open courses, the slots are too low and the nut likely needs attention.
Step 5: Position the bridge and set intonation
Because the bridge floats, you set intonation by moving it. Tune an open course, then play the same course fretted at the 12th fret and compare. The fretted note should be exactly one octave above the open string.
- If the fretted note is flat: move the bridge toward the neck.
- If the fretted note is sharp: move the bridge away from the neck (toward the tailpiece).
Make small moves, retune, and recheck. A compensated bridge top, where the saddle is slightly staggered between courses, gets every note very close. Mark the final bridge position with a strip of low-tack tape so you can return to it after future string changes.
Step 6: Match string radius to the fretboard
Finally, rest a straightedge across the strings just in front of the bridge. All four courses should touch it evenly, following the same curve as the fretboard. If one course sits high or low, the feel and action won't be consistent as you move across the neck. On many bridges this is set at the factory, but it's worth a check.
When all six steps line up, the instrument should feel even, fret cleanly, and stay in tune up the neck. That's the entire point of a setup.
Choosing Strings to Match Your Setup
Strings aren't a footnote to setup; they're part of it. Gauge changes tension, tension changes action and relief, and a big gauge jump can mean redoing your bridge height. Here's how the common gauges compare.
| Gauge | Typical E / A / D / G | Best for |
|---|---|---|
| Light | .010 / .014 / .024 / .036 | Easier fretting, brighter tone, less neck tension |
| Medium (standard) | .011 / .015 / .026 / .040 | The most popular balance of tone, volume, and playability |
| Heavy | .0115 / .016 / .026 / .041 | More volume and chop, more tension, harder on the hands |
Medium gauge, around .011 to .040, is the default most players land on and the reference point for the action targets in this guide. Beginners with sore fingers often start light and move up later. One safety note: if you have an older mandolin without a truss rod, heavier strings add tension the neck may not be built for, so favor lighter sets and ask a tech if you're unsure.
Change gauge, recheck setup. New tension can shift your action, relief, and even your intonation slightly.
DIY vs. a Professional Setup: When to See a Luthier
Knowing what to do yourself and what to hand off is part of doing this well. Here's a clear split.
Safe to do at home:
- Changing strings and tuning to pitch
- Raising or lowering action with the bridge wheels
- Setting intonation by moving the bridge
- Light truss rod tweaks, if your mandolin has an adjustable rod
- Cleaning and basic maintenance
Take it to a luthier:
- Fret leveling, crowning, or dressing rough fret ends
- Cutting a new nut or lowering slots you're not confident about
- Fitting or refitting a bridge to the top's arch
- Neck resets or any structural issue
- A bowed neck on an instrument with no truss rod
A standard professional setup commonly runs $50 to $150, with roughly $75 to $125 covering nut work, bridge height, intonation, and fresh strings. More involved jobs like fret leveling or a new bridge fitting cost more. For a beginner who isn't a natural tinkerer, paying a respected shop once and watching what they do is often the fastest way to learn.
How Often Should You Set Up a Mandolin?
Plan on a full setup about once a year, plus small seasonal adjustments. Wood moves with humidity and temperature, so a mandolin that played perfectly in summer can develop buzz or stiffness in dry winter air. The instrument is telling you something when the action or intonation drifts; a quick check usually sorts it out.
A simple ongoing habit: every time you change strings, recheck the bridge position for intonation and glance at your action. Catching small drift early keeps you from a frustrating practice session where you can't tell if the problem is you or the instrument.
Mandolin Setup FAQ
What is a mandolin setup?
A mandolin setup is the process of adjusting string action, nut slot height, neck relief, bridge placement, and intonation so the instrument plays easily, frets cleanly, and stays in tune across the neck.
How much does a professional mandolin setup cost?
A standard professional mandolin setup commonly costs $50 to $150, with $75 to $125 typical for nut adjustment, bridge height, intonation, and fresh strings. Heavier work such as fret leveling or a new nut costs more.
Can I set up my own mandolin?
Yes. Beginners can safely handle string changes, action height at the bridge, and intonation by moving the bridge. Fret leveling, cutting new nut slots, and neck or truss rod repair are best left to a qualified luthier.
What is good mandolin action at the 12th fret?
A common, comfortable target is about 0.050 in under the G course and 0.040 in under the E course at the 12th fret, measured from the top of the fret to the bottom of the string. Bluegrass players who want more chop sometimes go slightly higher.
How often should a mandolin be set up?
Most players benefit from a full setup about once a year, with smaller seasonal tweaks as humidity and temperature shift the neck and action.
Do all mandolins have a truss rod?
No. Many mandolins have a non-adjustable neck. Only adjust relief if your instrument has an adjustable truss rod, and use light, small turns.
From Setup to Real Progress
A good mandolin setup removes the excuses. Once the action is comfortable, the intonation is honest, and the neck is stable, anything that still sounds rough is a technique question you can actually work on, rather than a hardware problem hiding in plain sight.
That's where feedback matters. Plenty of players finish a setup, sound better, and still can't tell whether their picking, timing, or left-hand pressure is holding them back. If you want guidance from an established teacher, Mike Marshall's mandolin school on ArtistWorks uses a Video Exchange format where you submit playing videos and get specific responses on tone, timing, and phrasing. For a sense of where solid fundamentals can lead in a bluegrass setting, Sierra Hull's lessons are a strong reference.
Set it up right, keep your practice focused, and let a well-adjusted instrument do its job. The playing gets easier from there.
Want structured lessons and personal feedback on your playing? Try the ArtistWorks 7-day free trial.